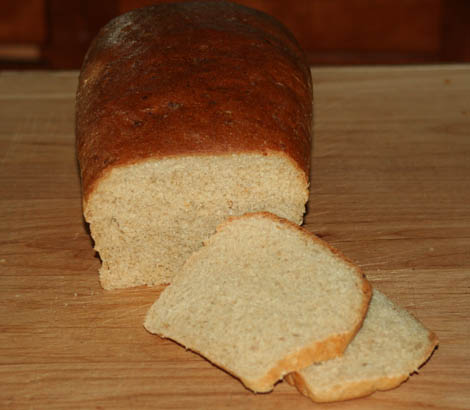
The following recipe is one I adapted from the best white bread I’ve ever eaten or made. The recipe is my mother in-law’s close friend, Syl. Syl experimented and created the delicious white bread recipe, but it didn’t convert to 100% whole wheat without some changes and quite a bit of research and trial and error on my part.
When I say my family suffered so yours doesn’t have to, I mean it! They’ve put up with bricks, dry crumbly slices, and bread that plain didn’t taste good. Here’s the recipe, and what I learned along the way.
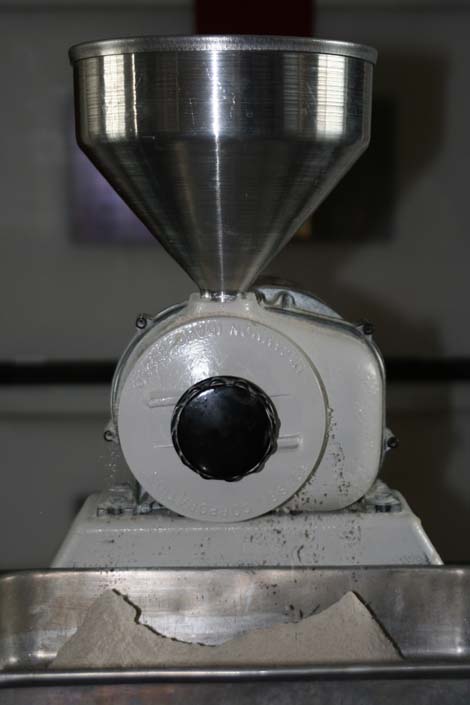 This is my Retsel Mill-Rite Mill. The whole wheat flour you purchase in the grocery store comes from a roller mill. A roller mill automatically separates the bran and germ (the high nutrient portions of the wheat berry) from the endosperm. Mills add back a portion (but not all of it!) of the bran and germ and package the flour as whole wheat. The result is a coarser flour that lacks the nutrients true whole wheat flour has.
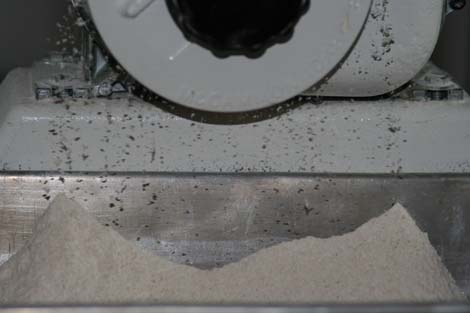
Heat during the milling process can also kill nutrients in the flour. My mill is a stone grinder that turns slowly to avoid this problem. I can also adjust the stones to produce a super fine flour, much finer than the grocery store variety. You can purchase stone ground wheat flour from Bob’s Red Mill to see the difference. I did that before I spent the money for my Retsel.
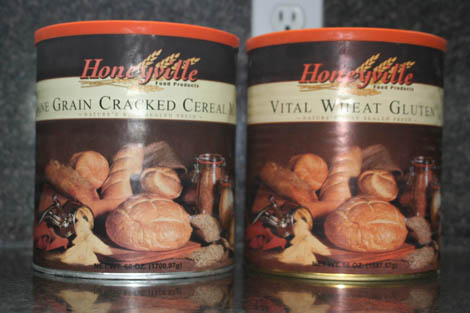
My next discovery was Vital Wheat Gluten. If you want sandwich bread, you need this. This is an amazing product that revolutionized my whole wheat bread making. The gluten helps the dough raise making the bread light–somewhat of a novelty for 100% whole wheat bread.
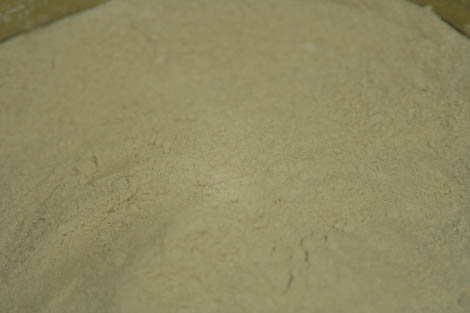 This is what vital wheat gluten looks like.
The can on the left is for my laziness. I can adjust my mill to crack wheat and then use it for the cooked cereal required in my recipe, but this is so convenient, and I have a breakfast cereal recipe that it’s really good in, too. It comes sealed with an oxygen absorber inside. I think it has a shelf life of 7 years like the Vital Wheat Gluten. I keep it in the freezer after I’ve opened it since it is a cracked grain and will go rancid sitting in the pantry. I order both of these from Honeyville Grain.
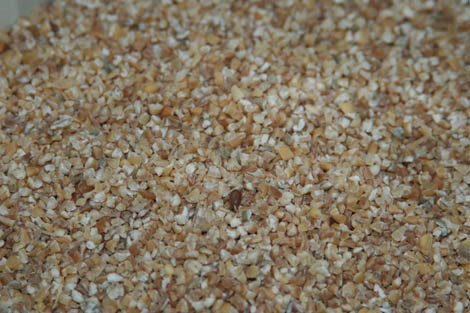
This is what the 9-Grain Cracked Cereal looks like before it’s been cooked.
My final bit of advice is to use Hard White Wheat instead of Hard Red Wheat. Hard White Wheat has a milder flavor, lighter color, and is easier to digest. It is equal to Hard Red Wheat in nutritional value. Okay, let’s get started.
1. Cook 1/2 cup 9-grain cracked cereal in 11/2 cups water in covered saucepan for 1/2 hour on low, low heat, stirring twice. (Or use any leftover hot cereal you may have from breakfast.)

2. Mix together 5 cups hot tap water, cooked cereal that has been slightly cooled, 1/2 cup sugar, 4 cups freshly ground wheat flour, 1 cup vital wheat gluten, 1/2 cup oil, and 2 T. yeast. (I use fast acting yeast.) Mix well and let sit covered for 1/2 hour to let the dough sponge.
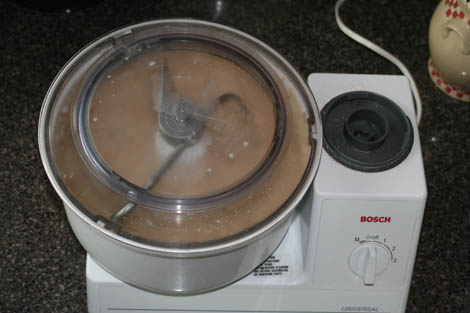
The sponge for white bread only takes 10-15 minutes, whereas a wheat bread sponge will often take up to half an hour. Start checking after 20 minutes so you don’t come back to dough oozing over the side of the bowl–not that I’ve done that a few times or anything!

This is what the dough looks like at the end of its sponge. You can see why it’s called a sponge.
3. Turn on the mixer and mix down. Add 2 T. salt and 4 cups whole wheat flour. Continue adding flour until the dough is stiff and still somewhat sticky. Knead for 8 minutes by hand or 5 minutes in a bread mixer, just until the dough is elastic. How do you know when the dough is elastic?
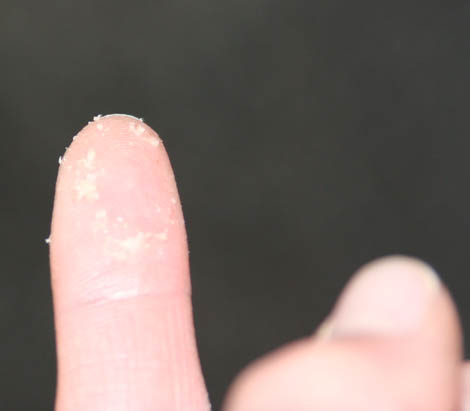
Syl’s recipe taught me a lot about bread making, but this next little tidbit is just amazing. First some back story. When I was first married and attempting to make bread (just white bread mind you), it turned out dry and heavy. I invited my mom to come watch me one evening. When I pulled the dough out of the bowl and started making it into loaves, she pushed her hand into a blob, tried to conceal a grin, and said, “It’s a bit stiff.” That was an understatement. There was absolutely no stickiness to the dough whatsoever. So if stiff dough or dry bread is your trademark, pay attention:
Press a clean, dry fingertip onto the top of the dough. Picture a circle on the flat of your fingertip. The dough should leave a ring of sticky dough on the outside of the ring but not on the inside.
Neat, huh! Now you will always know when to stop kneading and adding flour!
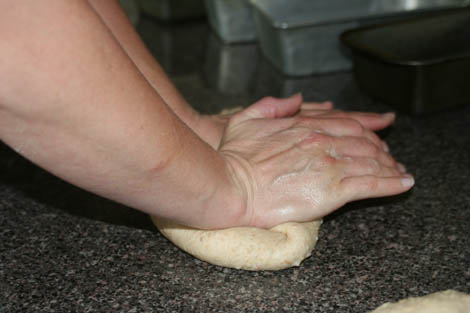
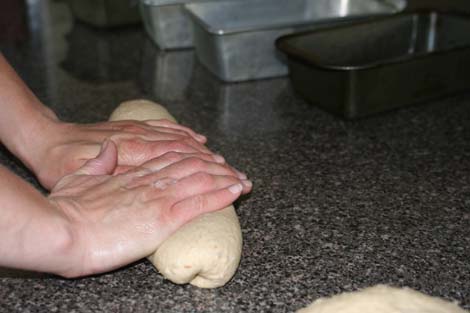
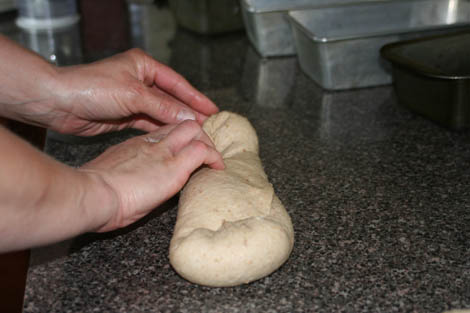
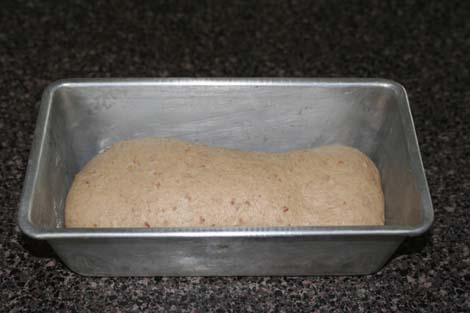
4. Divide into 6 sections. (I only do five because I have four regular sized loaf pans and two large ones. I use the four regular pans and one large to make it work.) Form each section into a loaf and place in greased loaf pan. DO NOT use a canned spray to grease pans. It makes the loaves form air bubbles. Don’t ask me how or why. It just does. (It also makes all my cakes fall.)
**No, I did not skip a step. I don’t let my wheat bread raise before forming it into loaves. I’ve had really bad luck doing that. The dough will raise beautifully in the bowl. The problem comes when I then form it into loaves and leave it to raise. It only gives a half-hearted try. I guess the sponge gets it all primed and ready to raise, and if I make the dough work a third time at raising, it’s too tired. That’s my analysis.
**Also, if you use a bread mixer to knead your dough, it doesn’t need to raise before forming into loaves even if it’s white bread dough.
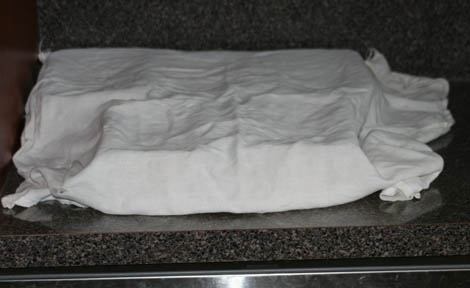
5. Cover with a dry, smooth dish cloth and let raise for approximately 1 to 1 1/2 hours until the dough is showing at least one inch above the lip of the pans. Unlike white bread, wheat bread will not raise much while it cooks in the oven.
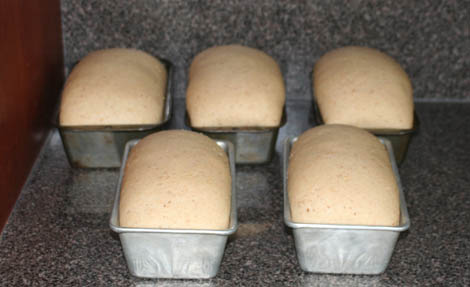
6. Bake 2 or 3 pans at time in a 350° oven for 31 minutes.

7. Remove from oven and run an open stick of butter over each loaf. Cool in pans for 10 minutes and then invert and release bread from pans. Continue cooling on rack or smooth kitchen towel.
Now your house smells so good. There’s nothing like walking into a home with bread baking. Umm…yum!

Enjoy!
Kate’s 100% Whole Wheat Bread
1/2 cup 9-grain cracked cereal mix (or cracked wheat, or other leftover cooked cereal from breakfast)
1/2 cup sugar
2 T. yeast
1/2 cup oil
2 T. salt
1 cup vital wheat gluten
12-14 cups stone ground wheat flour
1. Cook 1/2 cup 9-grain cracked cereal in 11/2 cups water in covered saucepan for 1/2 hour on low, low heat, stirring twice.
2. Mix together 5 cups hot tap water, cooked cereal that has been slightly cooled, 1/2 cup sugar, 4 cups freshly ground wheat flour, 1 cup vital wheat gluten, 1/2 cup oil, and 2 T. yeast. Mix well and let sit covered for 1/2 hour to let the dough sponge.
3. Turn on mixer and mix dow. Add 2 T. salt and 4 cups whole wheat flour. Continue adding flour until the dough is stiff and still somewhat sticky. Knead for 8 minutes by hand or 5 minutes in a bread mixer, just until the dough is elastic. (Press a clean, dry fingertip onto the top of the dough. Picture a circle on the flat of your fingertip. The dough should leave a ring of sticky dough on the outside of the ring but not on the inside.)
4. Divide into 6 sections. Form each section into a loaf and place in greased loaf pan. DO NOT use a canned spray to grease pans. It makes the loaves form air bubbles. Don’t ask me how or why. It just does. (It also makes all my cakes fall.)
5. Cover with a dry, smooth dish cloth and let raise for approximately 1 to 1 1/2 hours until the dough is showing at least one inch above the lip of the pans. Unlike white bread, wheat bread will not raise much while it cooks in the oven.
6. Bake 2 or 3 pans at time in a 350° oven for 31 minutes.
7. Remove from oven and run an open stick of butter over each loaf. Cool in pans for 10 minutes and then invert and release bread from pans. Continue cooling on rack or smooth kitchen towel.
*Note: All times are approximate as new yeast rises faster than older yeast, and the moisture of flour varies.


That sounds so good. I love making bread, it is very relaxing. But now I a gluten free, so that means I can just look at food and wish I could eat it.
My cousin’s husband is allergic to gluten. She grinds rice into flour and makes bread that way. She says it’s much cheaper than buying the rice flour bread at the health food store.
I have heard that if you sprout your wheat and then dry it and grind it to make your bread it does not cause the same problems as regular wheat. I asked my mom, who also has celiac, about it and she said the only thing she can think of that would make a difference is that when wheat is sprouted it creates an enzyme that helps the digestion of the wheat.
I’ve wondered if sprouted wheat could be tolerated by gluten-allergic individuals since it possesses so many other health benefits.
Kate, I have made this recipe a number of times now and I really do love it. The bread is awesome every time. Thank you for posting it. I am wondering have you tried using spelt? Wondering if you bake with it at all and how you adjust your recipes.
Hi Sheila! Glad you like the bread. I’ve never used spelt–only read about it. It’s something I’d like to try sometime.
I just barely tried this after finally getting wheat gluten. It is indeed yummy! I made two batches over the weekend. What size bread pans do you use? Are they 4×8 or 5×9? I have the bigger pans and had better luck my second time with this recipe when I divided the loaves into four pans instead of six. But who knows — I was also testing whether the wheat given to me from my mom’s food storage is viable … that, and the strength/freshness of my yeast. Er, it’s kind of hard to know what is what when both influence the other!
Did you buy your Retsel mill online or through a dealer? Right now I have just a basic hand grinder. Oh, my sore muscles. I tell myself the money I save on a gym membership could help pay for a good wheat grinder — nice theory if I actually had a gym membership!
I’m so glad you liked it! I have 2 large pans and 3 small ones. Four large pans would probably be perfect.
I’d say you got quite a workout. Just a single batch would be enough, but you did it twice!
I bought the Retsel online. You may have to wait a few weeks because they group their orders and produciton times to be more efficient. They are located in Southern Idaho.
The reason your dough won’t rise well three times is because you are using a fast acting (rapid rise) yeast. If you used an active dry yeast you could let it rise 4 or even 5 times. With wheat bread especially, the more you let it rise, the fluffier it gets. I do at least 3 rises. I am excited to to try your recipe. With the cracked grains in it, it sounds really good!
Beth, thank you so much for telling me that. I will have to try that. Thank you so much!